These are two of the most important rooms in any home renovation – and can not only make a big difference to your lifestyle but also add value to your property. Your kitchen is all about practicality and convenience, while a bathroom needs to be somewhere you retreat for some pampering. Many of our clients opt to do a complete kitchen and bathroom renovations at the same time. This makes sense from a practical point of view as you:
Minimise disruption to your home and life
Make the most of all the tradies onsite for cost savings
One can also help negotiate better prices from suppliers if you are shopping for both spaces
Watch our full [BEFORE & AFTER] kitchen and bathroom renovation.
Kitchen and Bathroom Renovations Sydney – Introduction Into What We Do
Complete kitchen and bathroom renovations are our bread and butter, and we have lost count of how many we have worked on – from smaller renovations to apartment renovations to terraces renovations.
We project manage your kitchen and bathroom renovation from start to finish and deliver your project on time and to budget. Most importantly, you get to deal directly with us, which means no sales reps or chasing tradies – we coordinate everything and make it happen.
We use a network of qualified, licensed tradesmen and contractors for all our projects. Needless to say, they are experienced professionals who take pride in the work they carry out.
Sound good?
Let’s get started on what you need to think about to make your kitchen and bathroom renovation project happen.
Planning your Kitchen and Bathroom Renovation
The first step is to plan your kitchen and bathroom renovation. This should begin with:
An outline of what you want from these rooms and what features are on your must-have list.
Then think how you want to use these spaces, how it relates to the rest of your home.
Once that’s done you can start researching materials, specs, appliances, and fittings to get an understanding of what your budget will look like.
Get inspiration and design ideas for your project online from sites like Houzz
Let’s take a look at what to expect in terms of the timeline of your kitchen and bathroom renovation project – from our first chat to when the tradies arrive to start work.
We will start with the kitchen;
Complete Kitchen Renovation: Everything You Need to Think About
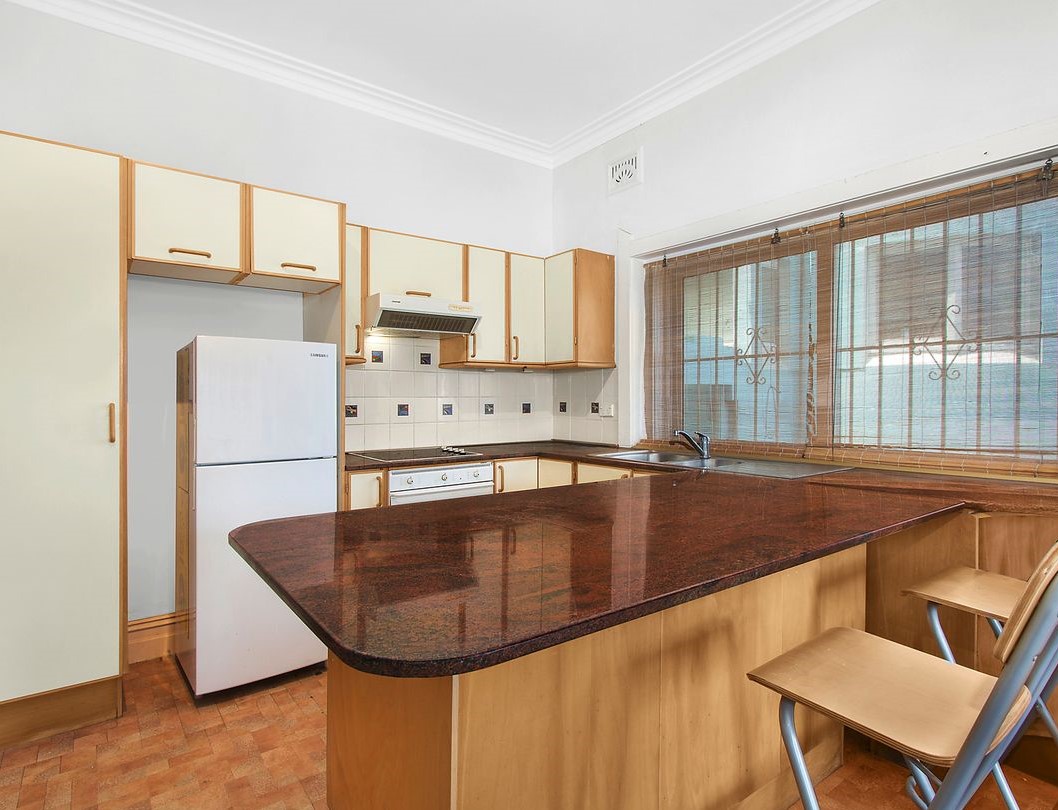
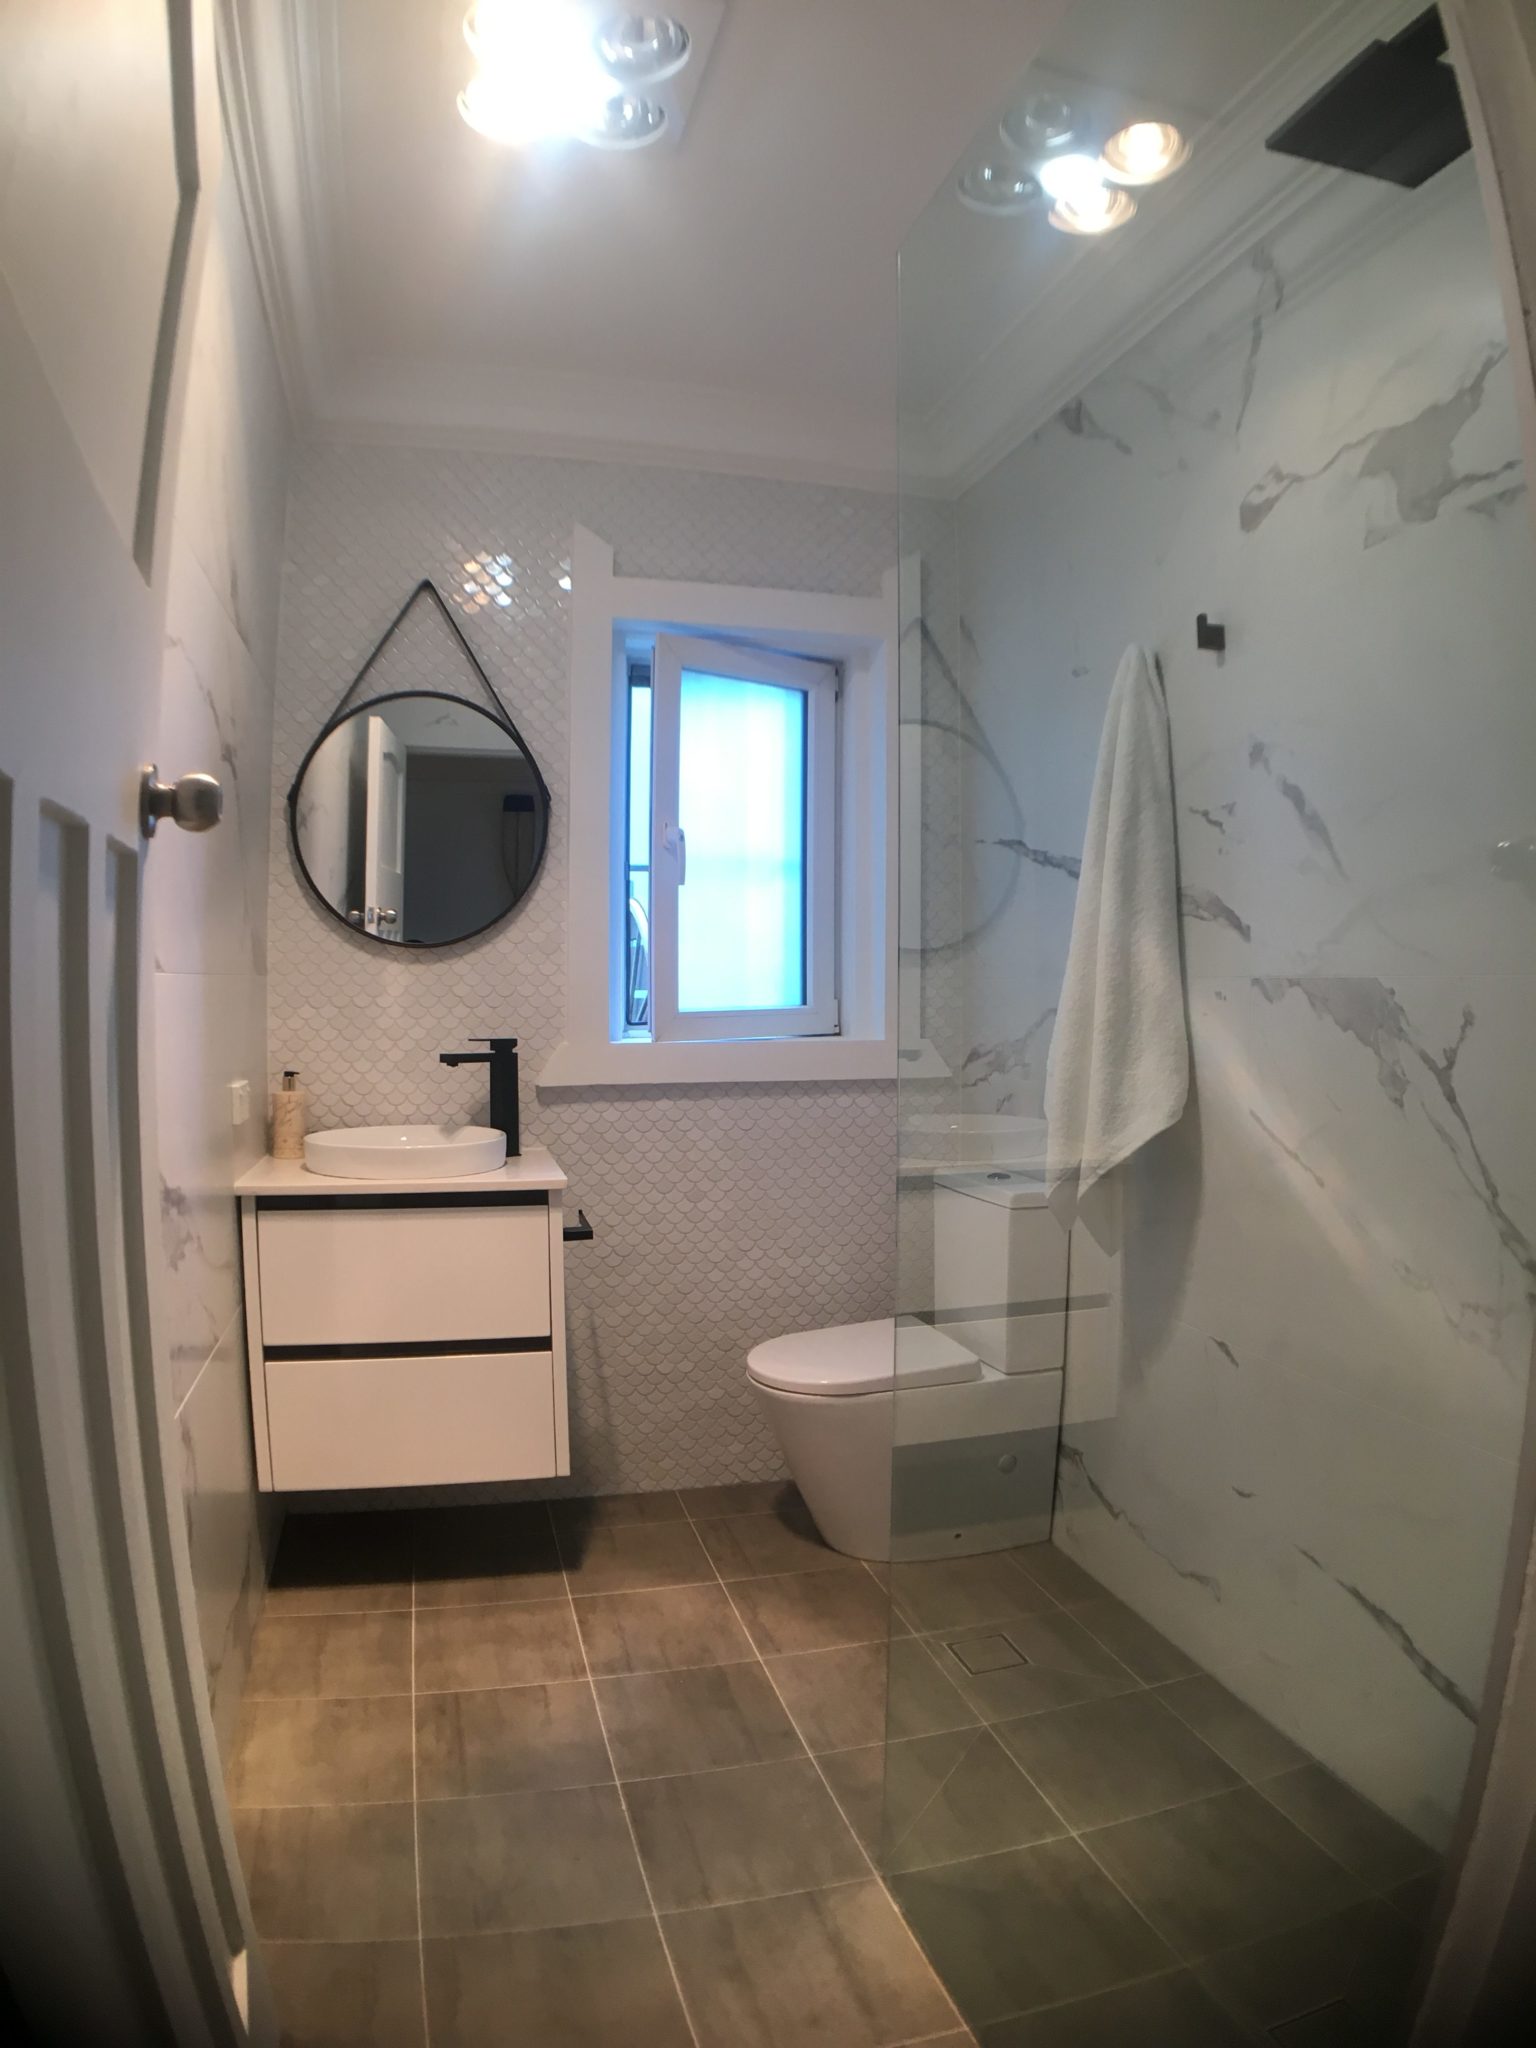
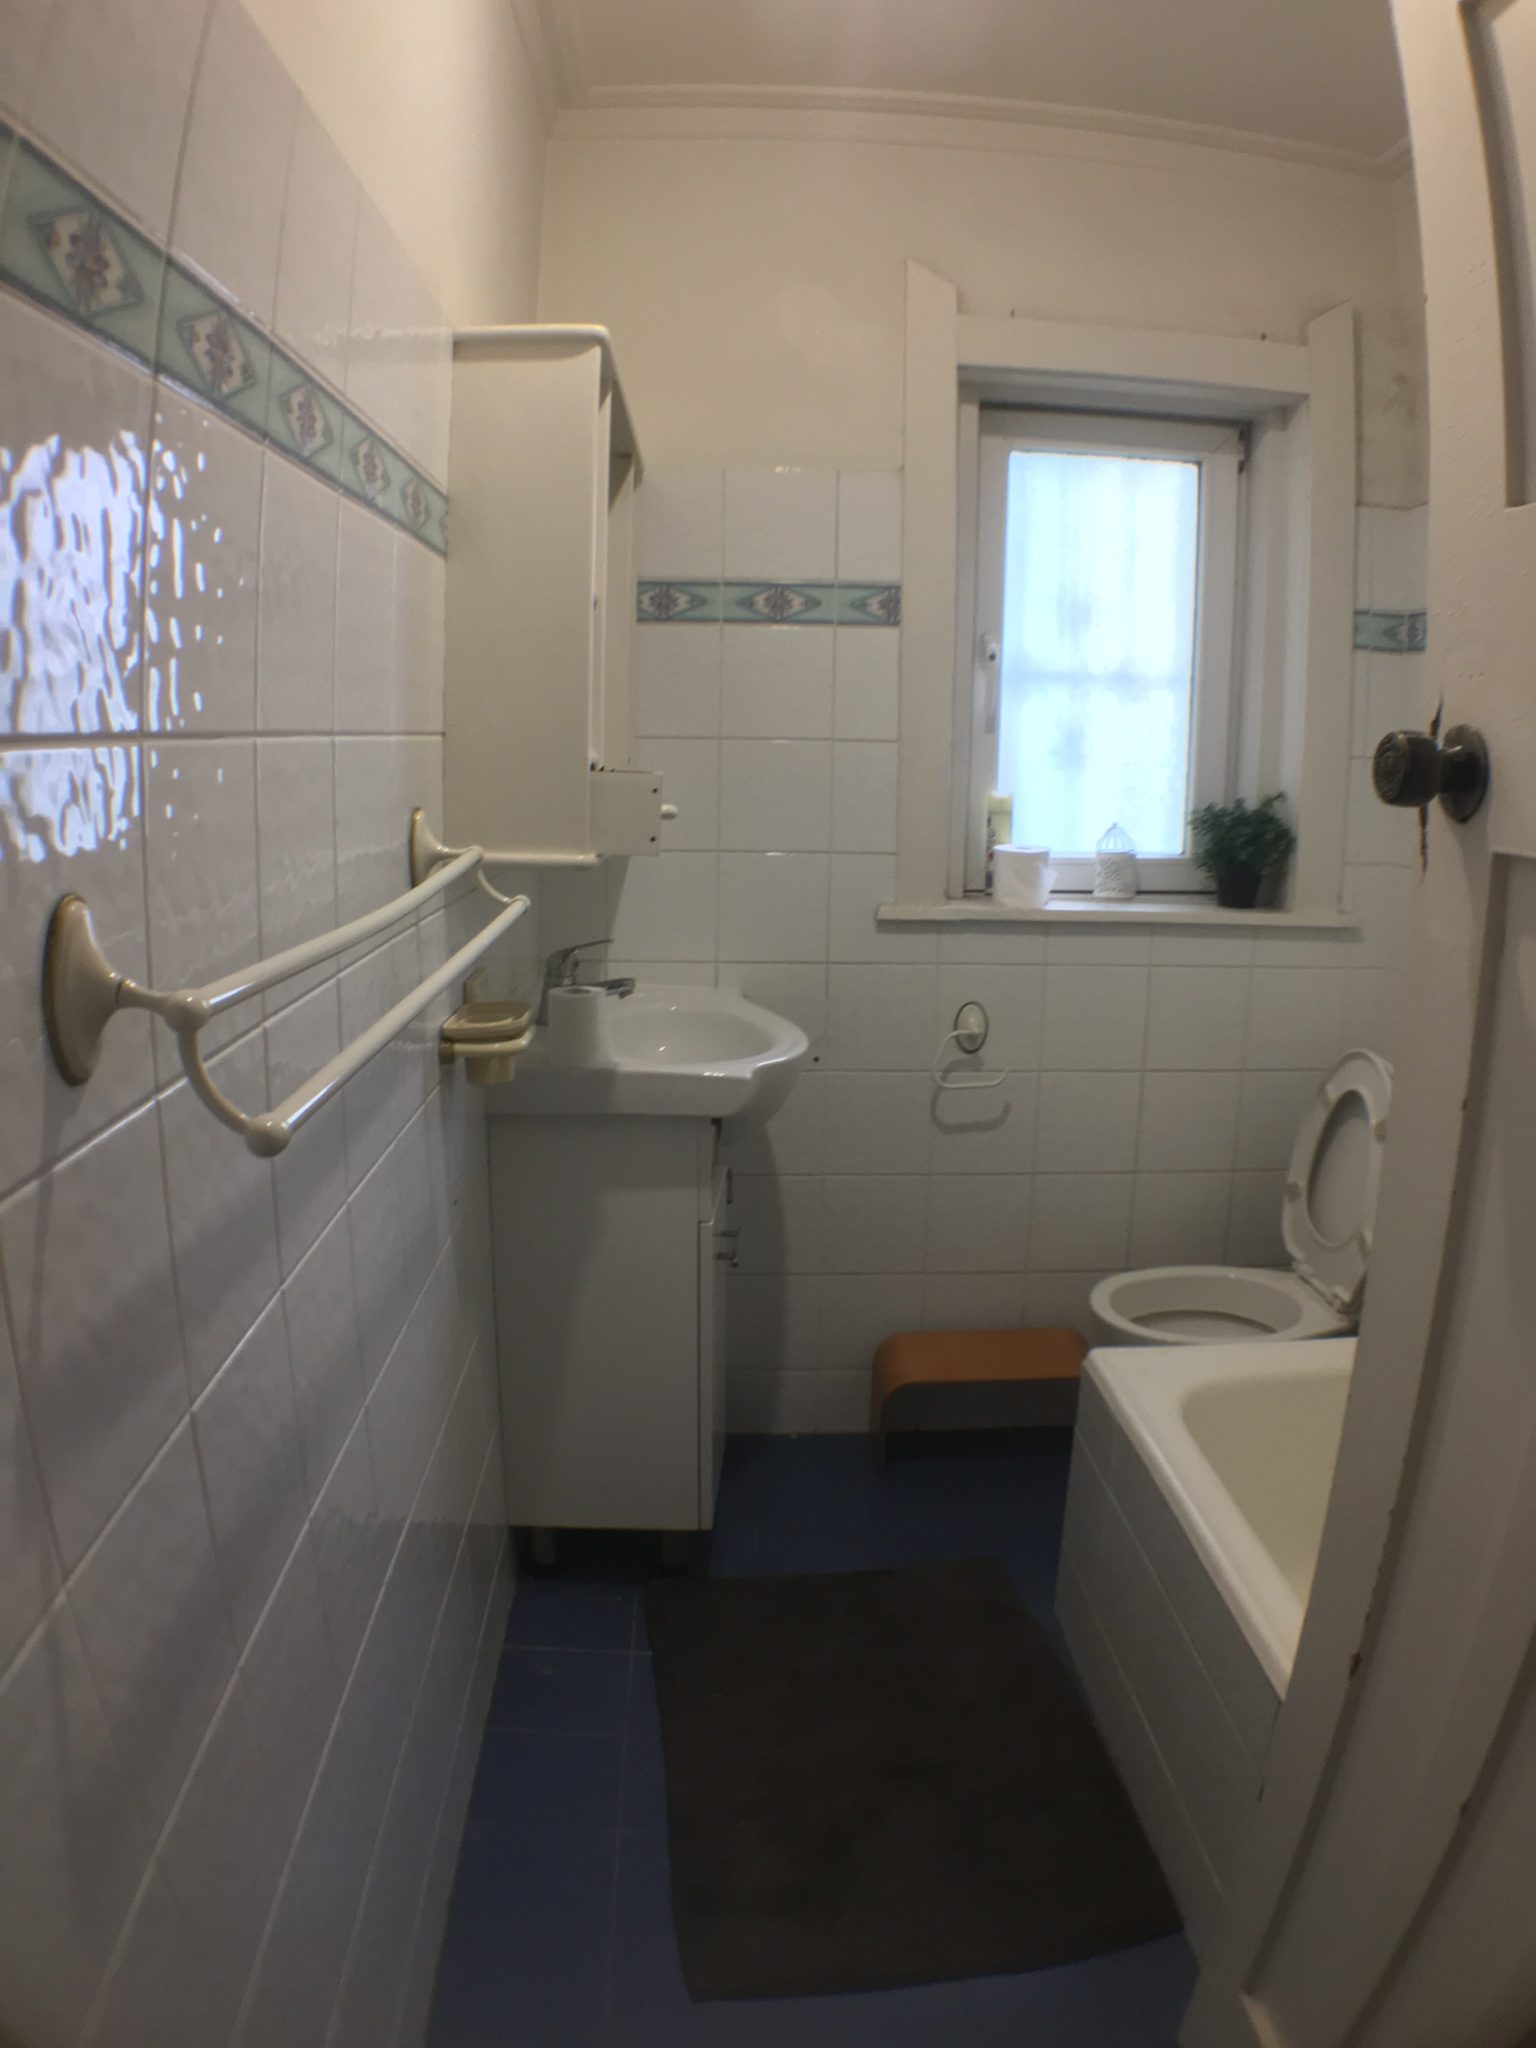
BEFORE
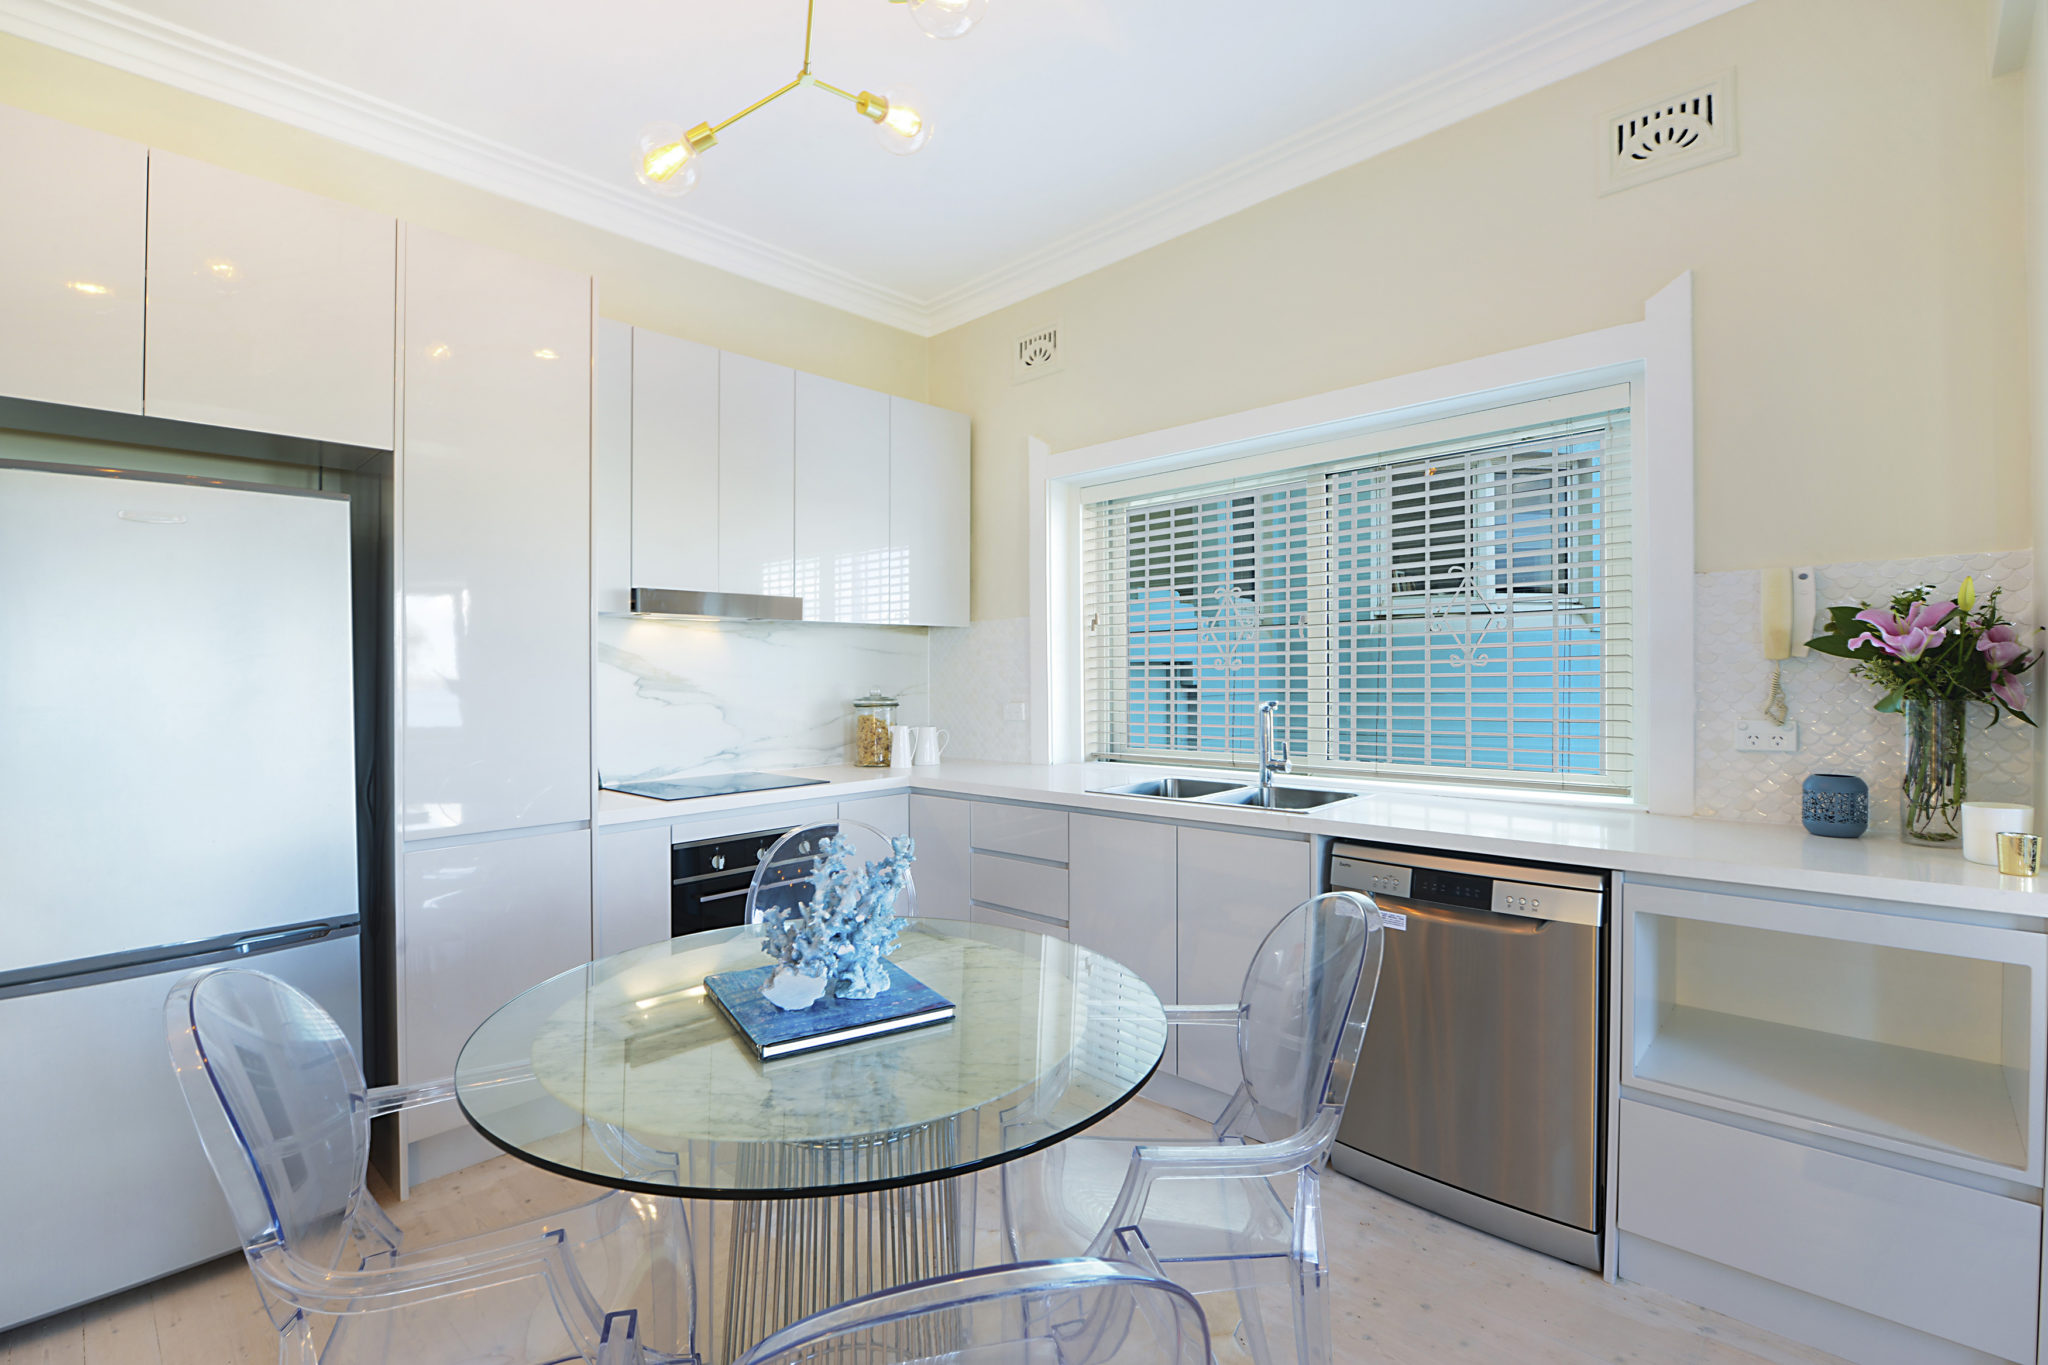
AFTER
Your kitchen package has a number of crucial elements that you need to work out, specifically:
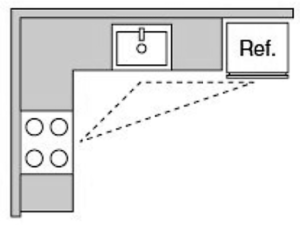
1. Start with your kitchen layout
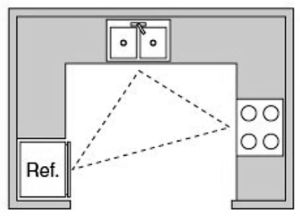
Like any space, a well designed and planned kitchen layout is all about having your sink, fridge/freezer and stovetop/oven in the classic work triangle. This makes accessing food, cooking and cleaning up afterward easier.
You also need to think about practical locations for your dishwasher, microwave and any other appliances you use regularly – as well as the number and location of all your power points.
Small tricks like taking your cabinets to the top of the ceiling with a very small bulkhead can help maximise storage space, or by installing a larger bulkhead where the existing room cornice can wrap around seamlessly.
In terms of choosing what type of storage you want, keep in mind is that drawers are generally more expensive than doors – so budget for approximately $300 per drawer. We help you design your kitchen so the layout suits the way you work in the kitchen.
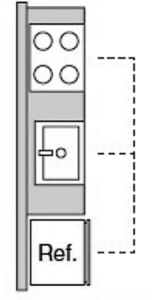
The most common kitchen layouts include:
L-shape kitchens are very popular as they are practical and don’t waste space. This is because they use the corner of the room and suit an open plan kitchen/dining/living area, where they allow free movement and plenty of benchtop workspace.
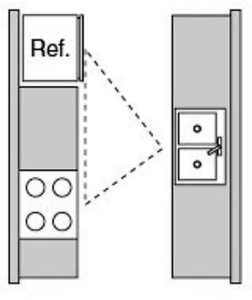
Single wall kitchens suit a small space, apartment renovation, or if you want to have an open plan arrangement. You do need to bear in mind that this layout limits benchtop working space, and you don’t have the convenience of the kitchen work triangle.
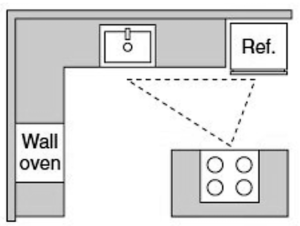
U shape layouts are another good option for smaller spaces, but be aware that, depending on your dimensions, a kitchen island is normally out of the question. If space is at a premium you really need to design your kitchen with access in mind – and think about how your dishwasher, fridge and drawers open.
Galley kitchens run along two parallel walls, and because of this normally have a lot of benchtop space. Because you are working with a narrow space you need to be smart about your design.
A kitchen island is a great feature if you have space, and make for handy additional benchtop workspace, and can also house a sink, dishwasher and even a built-in wine rack. Together with bar style seating you also have a breakfast bar or alternative dining space available to you.
2. Select kitchen appliances that suit your space and lifestyle
Choosing your kitchen appliances (try Appliances Online) is all about selecting the model with all the features that you need. You also need to think about the energy efficiency of your kitchen appliances – specifically the amount of electricity and water they use, and not forgetting product warranties.
You can use the star rating system found on each appliance to help you make a call on energy efficiency. In terms of essential must-have appliances, you will need to choose an oven (freestanding or cabinet) cooktop (electric, gas or induction), dishwasher, fridge/freezer, and microwave.
In terms of dimensions standard ovens are either 600mm or 900mm wide and are going to need a rangehood – integrated, pull out or canopy – that is matched to the oven.
For your kitchen sink, this can be a top mount or under mount style. If undermount, the benchtop supplier will charge extra to polish the edges.
We encourage you to source and supply your own appliances, and we will custom design the kitchen around them.
3. Getting your kitchen storage right
They say you can’t have enough kitchen storage, and we couldn’t agree more.
Here you need to think about planning enough overhead cabinets, base/floor cabinets, deep drawers, and wall cabinets/pantry space – and having it all in logical and easy to access spots. The goal is to reduce clutter and prioritise organisation.
Look to design as much drawer space as possible in your new kitchen. They are not only easier to access than cupboards, but you will also fit more into them. There are all sorts of inserts for cutlery and crockery to make sure you keep these areas tidy.
Eye level or overhead cabinets are convenient and mean you don’t have to bend down, and when extended to the ceiling offer a great use of space. If you want a pull-out pantry, having custom inserts and storage solutions from a supplier like Blum will make it easier to keep all your dry goods in order. Open shelving is useful for items that you use often, or for a walk-in pantry where you can easily see and access items.
You will also be glad to know that there are solutions for those awkward corner cabinets, which often end up as dead space. Here corner drawers or lazy Susan-style revolving shelves can help maximise usable storage in your kitchen. The same goes for the area under your sink – where modern storage hardware and custom shelving can be integrated around the sink waste and plumbing.
For other blind spots and nooks in a kitchen, you can always get an extra shelf installed to store wine or your collection of cookbooks. You can even look to use the space in your kickboards for things like baking trays or serving platters.
4. Think about the style and finish of kitchen doors and panels
We recommend choosing quality custom cabinetry that uses solid carcasses and HMR Board – High Moisture Resistant Board for longevity and durability. In terms of the doors and faces of your cabinets, you have the options of laminate and polyurethane, each which has its own pros and cons.
Laminate cabinet finish
Laminate is basically paper compressed at high pressure with a durable top layer, which is fused to HMR Board.
Pros: Laminate is a cost-effective and long-lasting surface for the kitchen, is easy to work with and comes in a wide variety of designs. It is also easy to clean.
Cons: Some laminate finishes do have a tendency to peel, and is also able to be scratched or chipped.
Visit Laminex to get an idea of a laminate finish and the range of designs available.
Polyurethane cabinet finish
Polyurethane or poly is a painted finish – similar to that used to colour cars – which is also baked to give it a very smooth and tough surface.
Pros: This finish looks fantastic, is really durable and you have the entire Dulux range of colours to choose from.
Cons: Poly is more expensive than laminate.
Also look to select quality knobs, handles, soft closing hinges, and drawer runners – like Blum, which are known for their quality and innovation. Or opt for a handleless design for a clean, seamless look. We only use soft closing hinges and drawer runners.
5. What about your kitchen benchtops?
Look to design as much kitchen workspace as you can, and here engineered stone like Caesarstone or Quantum Quartz ($$) make a great option for your kitchen benchtops. Not only does engineered stone look fantastic, but it is non-porous, heat resistant and can take the rough and tumble of kitchen life. You also have the option of laminate ($), natural stone like marble and granite ($$$) and even concrete and stainless steel – depending on your taste and budget.
All these products come in a wide variety of finishes and colours, as well as thicknesses. If you are wanting a 40mm edge for your benchtop, be aware that it is just the edge that is that profile – the rest of your benchtop remains at 20mm.
For your kitchen sink, this can be a top mount or under mount style. If undermount the benchtop supplier will charge extra to polish the edges.
We help choose a benchtop design and profile that complements your kitchen package.
6. Add a splash to your kitchen splashback
Your kitchen splashback is not only there to protect your walls, but it can also be a real feature of the room.
Here you can go for tiles ($ – $$), glass ($$) or even engineered stone ($$$). Glass is the easiest to clean, and you can choose from any number of Dulux colours to customise it or opt for mirror or a metallic colour.
Tiles can give a more rustic or custom feel, like the current trend for subway tiles. Or you can match your benchtop with an engineered stone benchtop.
7. Practical and stylish kitchen flooring
Kitchen flooring needs to be practical and look good – and there are a wide range of materials to choose from.
At the lower end of the budget you have vinyl and laminate, with hardwood and tiles more expensive – and all will make a serviceable surface for your kitchen. We recommend tiles as they are more practical for a semi-wet area.
If you are replacing kitchen flooring, think about how this impacts the adjacent rooms – and if you should replace these at the same time. You also need to factor your flooring into your overall design so the kitchen heights are all correct.
8. Get your kitchen lighting right
Get your kitchen lighting right by making sure every area is covered. It needs to be functional and set the right mood.
That means thinking about your general, task and natural light sources and where they need to be. This could be a trio of pendants over a benchtop, LED strip lighting under the overhead cabinets or LED downlights to illuminate the whole room.
Your bathroom renovation has a number of crucial elements that you need to work out, specifically:
1. Make the bathroom layout work for you
A bathroom renovation is all about making this space practical and luxurious. If you are adding features then think about where your existing plumbing is, and what the impact is of moving these.
All of your plumbing needs to meet the Plumbing Code of Australia (PCA), which is the technical standard for all plumbing and drainage work in NSW. We only use the top local tradies, so you can rest assured that everyone who works on your plumbing is licensed by NSW Fair Trading.
In terms of trends, many of the homes we work on are installing walk-in showers with frameless glass shower screens, as well as back to wall-mounted toilets and wall hung vanities. These tricks all help to make space look bigger, help with cleaning – and they work.
If you want to keep your bathroom costs down try not to move your services – like plumbing. Generally speaking, wall plumbing is smaller and therefore easier to relocate than floor plumbing as we can chase walls and run pipework in walls.
When it comes to relocating floor plumbing this involves moving really large pipes. This could involve serious jackhammering, core drilling through concrete slabs, and x-raying the floors. If you are in an apartment we may even need to access your floor from your neighbour’s unit below – which will increase the cost of the renovation.
2. Bathroom vanity and basin – to wall mount or not?
You are going to want enough storage in your bathroom vanity – and as mentioned, a wall mounted unit not only looks good but makes it easy to clean your bathroom floor. If your bathroom is a high traffic area think about a twin basin with decent bench space.
To clarify, a bathroom vanity is a cabinetry that is often integrated with a basin, where the basin can be inset, semi-recessed, or sit above the counter. You can also install a freestanding basin in a small bathroom where there is no space or need for storage.
A common mistake people make or miss when buying wall hung vanities, is they forgot that their old vanity has a floor waste that goes all the way to the ground. This becomes a variation cost if the builder needs to move the plumbing so it is not visible.
Chat to us before you buy your vanity so we can talk you through your options. See our suppliers page.
3. Bathroom tub – freestanding or in-cradle?
Your bathtub can be the centerpiece of your bathroom, where a modern freestanding or vintage ball and claw can both do the trick. There are a wide variety of brands to choose from in a range of sizes. Standard bathtub sizes are 1500mm to 1650 millimeters long and 750mm wide, but you can certainly go bigger if you have space.
4. Bathroom fixtures and fittings – taps, showerheads and shiny bits
Your bathroom fixtures and fittings should all be practical, coordinate with each other and look stylish. Tapware comes in chrome, brass, gold, stainless steel and even a black finish. Be careful choosing these items as they can quickly increase the cost of your renovation. Other elements you need to put on your list include lighting, heating, towel rails, and shelving.
5. Bathroom tiles – small or big, porcelain or ceramic?
Tiles are the most practical and popular flooring for your bathroom, tiles are water-resistant, easy to clean and durable. Tiles are also a sensible choice for your bathroom walls – where you can opt to use the same as your floors or contrast. But which tile is best – porcelain or ceramic?
Porcelain Tiles:
Pros: Dense, impermeable and extremely durable, less porous than ceramic
Cons: Heavier and more expensive than ceramic, and trickier to cut
Ceramic Tiles:
Pros: Cheaper than porcelain, lighter and easier to cut
Cons: Porous if unglazed and less durable than porcelain
In terms of cost, larger tiles are cheaper to lay than smaller, more detailed mosaics as these take longer and tilers charge more for them.
6. Shower screen – to frame or not to frame?
For your shower screen, you have a choice between framed, frameless and semi-frameless. People have moved away from framed shower screens – which are the cheaper of the three – and the trend is for the seamless, clean look of frameless and semi-frameless screens. Walk-in showers are really popular, especially if you opt to design an open plan ‘wet room’ style bathroom.
Here a frameless shower screen can make your space look really clean and modern. You definitely pay for the look of frameless, which is a pane of glass with a few brackets – but you can’t beat the look and they are also easier to keep clean. A mid-range option is a semi-frameless shower screen which has a low profile frame and a frameless door.
Now let’s take a look at the staging of your bathroom renovation, and what order everything happens in.
Steps by Step Bathroom Renovation
Follow these steps;
1. Design Bathroom Layout
Getting the layout of your bathroom right is crucial if you are going to enjoy this space. We begin by identifying where your plumbing goes and deciding with you, a logical flow for everything, including the best location for your bathtub, vanity, storage, toilet, and shower.
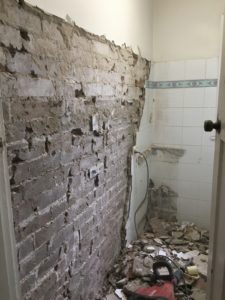
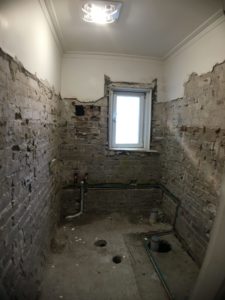
2.Demolition
Once the bathroom design is finalised we can move onto demolishing and stripping out your old bathroom. That means removing all the old fittings, cabinetry as well as wall and floor tiles as required. Here we work hard to minimise any mess and leave the space ready for the works to begin.
3. Plumbing Rough-In
Work now starts on your bathroom with the plumbing rough-in, which is when we mark up all the locations for your wall plumbing and make sure all the dimensions are right. It is crucial to get all this right otherwise your fittings will not fit, or you may not have enough clearance or space around your fittings.
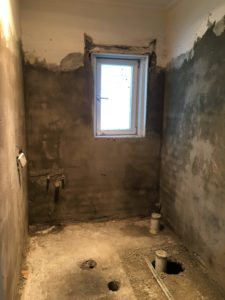
4. Rendering Walls
Rendering comes next, which gives your walls a smooth finish. The first step is to apply a coat, followed by screeding, floating and sponging – ready for your walls to be tiled or painted later. A quality rendering job is really important for small mosaics tiles when you need a perfectly smooth surface. You will also need to render if the old tiles don’t come off the wall easily and the demo team smashes the tiles and cement render out.
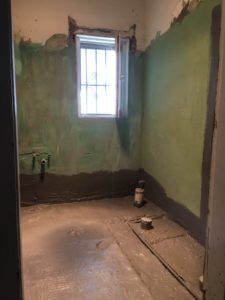
5. Waterproofing
Next is waterproofing, which needs to be done right – and to Australian Standard (AS 3740-1994) – to avoid any leaks or nasty surprises later on. A level floor helps, so your tiler needs to be on top of this. Waterproofing is also done by a qualified tiler or dedicated waterproofer, who install the polyurethane or acrylic membrane paying special attention to the entire shower floor, as well as the walls to 1800mm. If your bathroom is on the second floor or in a multi-level apartment block the whole floor also needs to be waterproofed.
6. Cement Bedding
Getting the water to drain in your bathroom is critical to avoid water pooling. Inexperienced tilers often get the falls wrong – and it will be an expensive fix. The falls of your cement bedding need to follow Australian Standard (AS 3740– 2004) and drain to the floor waste of your shower and bathroom.
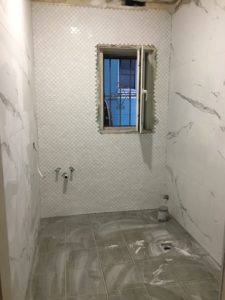
7. Tiling
We now move onto your bathroom floor and wall tiling. Here some practical things you need to know, include that floor tiles should be at least 600mm x 300mm for the falls to the drains. The preferred tile size is actually 300mm x 300mm as this makes it easier to get the right falls. If you are thinking of laying mosaics tiles, be aware tilers charge more for these as they are more fiddly and take longer to lay. Builders also have to make sure bathroom walls are dead straight as mosaics show up even the slightest variation in the wall. Go for larger tiles if your wall is not dead straight as they can help hide wall inconsistencies.
8. Plumber and Electrical Fit off
Time to get excited, because the plumber fit off is when your bathroom begins to take shape. All your fittings – toilet, bathtub, vanity, basin, & tapware – needs to be onsite for our plumbing and electrical team to install. This will also include items like your lighting, exhaust fans, and heated towel rail. We make sure that your freshly tiled walls and floors are protected and not damaged during this phase of the works.
9. Shower Screen & Mirror
Shower screen – framed, frameless or semi-frameless – is one of the last elements to get installed. Together with any mirrors, which are not just a practical necessity, but can help make your bathroom look a lot more spacious.
10. Clean
We are getting close now, as we clean up ready to have all the joints siliconed and sealed. A builders clean makes sure all the debris, excess grout and materials are removed so all the wet area edges are ready for siliconing, and to ensure the silicone is consistent and level.
11. Silicone Joints
Siliconing makes sure all the edges, joints and corners of your bathroom, bathtub and shower recess are sealed to prevent moisture penetration. Once dry your bathroom is good to go!
Hope that helped! If that too overwhelming, leave to the experts and we will coordinate all the elements of your bathroom renovation, which avoids contractors working on top of each other – but also saves you worrying about chasing tradies.
If you are renovating in a strata building, be aware that you will need to get approval for your kitchen and bathroom renovation. You normally have to submit your plans to the body corporate, strata committee and/or strata manager. They will then assess your submission to ensure it meets the necessary standards and rules set out by the body corporate.
How much will my Kitchen and Bathroom Renovation cost?
When it comes to planning your kitchen and bathroom renovation job you are going to want to know how much it is all going to cost. Your project is going to be affected by:
The size of your kitchen and bathroom renovation
The amount of cabinetry, storage, and benchtop you install
The type of materials you choose
The appliances and fittings you choose
The best way of working the cost of your kitchen and bathroom renovation is to get in touch so we can visit your home. We can then work out exactly what you want from your kitchen and bathroom and begin to develop a final design and budget.
Alternatively view our other suppliers list page here.
Why renovate with us?
The main thing we do is take the stress off your shoulders.
How?
By working with you in the planning phase to help work out a detailed budget that takes everything into account. We then project manage your kitchen and bathroom reno from start to finish and deliver your project on time and to budget. And you get to deal directly with us, which mean no sales reps or chasing tradies – we coordinate everything and make it happen. We also use a network of top-notch tradesmen and contractors for all our projects. Needless to say, they are experienced licensed professionals who take pride in the work they carry out.
To provide the best experiences, we use technologies like cookies to store and/or access device information.
Functional
Always active
The technical storage or access is strictly necessary for the legitimate purpose of enabling the use of a specific service explicitly requested by the subscriber or user, or for the sole purpose of carrying out the transmission of a communication over an electronic communications network.
Preferences
The technical storage or access is necessary for the legitimate purpose of storing preferences that are not requested by the subscriber or user.
Statistics
The technical storage or access that is used exclusively for statistical purposes.The technical storage or access that is used exclusively for anonymous statistical purposes. Without a subpoena, voluntary compliance on the part of your Internet Service Provider, or additional records from a third party, information stored or retrieved for this purpose alone cannot usually be used to identify you.
Marketing
The technical storage or access is required to create user profiles to send advertising, or to track the user on a website or across several websites for similar marketing purposes.